Short Topics :- {AWS VPC}
As a technology enthusiast with a passion for efficient operations, I specialize in Linux, AWS Cloud, Prometheus-Grafana, Security, Virtualization, and Git. With a deep understanding of these technologies, I am able to streamline development processes and ensure smooth operations for businesses.
How to create AWS VPC with descriptions:
Creating an AWS Virtual Private Cloud (VPC) involves several steps, and I'll describe them below along with a brief description of each step:
Login to AWS console: Go to the AWS management console and log in to your account.
Navigate to VPC Dashboard: Once you're logged in, navigate to the VPC dashboard by selecting the "Services" menu in the top-left corner of the page, then selecting "VPC" under the "Networking & Content Delivery" category.
Create a VPC: Click the "Create VPC" button on the dashboard and provide the following information:
Name tag: Give your VPC a name that helps you easily identify it.
IPv4 CIDR block: This is the IP address range for your VPC. You can choose any private IPv4 address range (e.g., 10.0.0.0/16).
IPv6 CIDR block: You can choose to assign an IPv6 CIDR block for your VPC, or leave it blank.
Tenancy: You can choose between "default" (shared tenancy) or "dedicated" (single-tenant) instances.
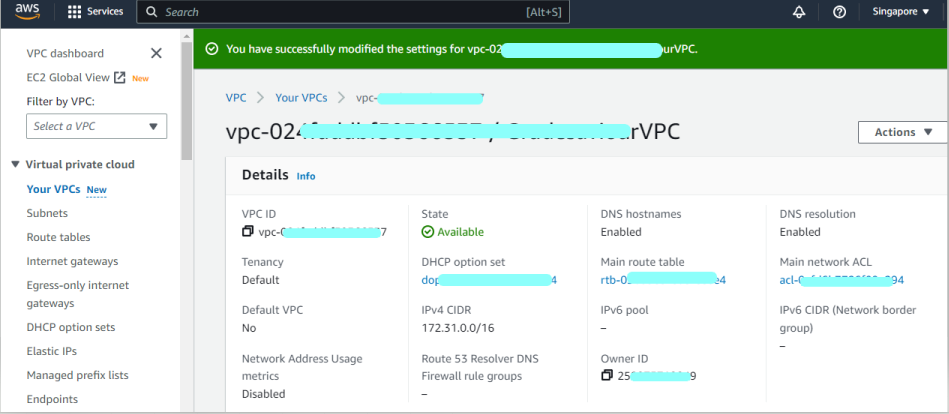
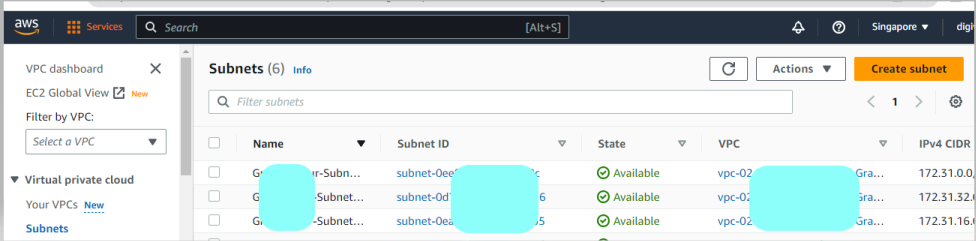
- Create subnets: After you've created your VPC, you'll need to create one or more subnets within it. A subnet is a range of IP addresses within the VPC's IP address range. To create a subnet:
Click the "Create Subnet" button on the VPC dashboard.
Provide a name tag for the subnet.
Choose the VPC you just created.
Select an availability zone (AZ) in which to place the subnet.
Choose an IPv4 CIDR block for the subnet (which must be a subset of the VPC's CIDR block).
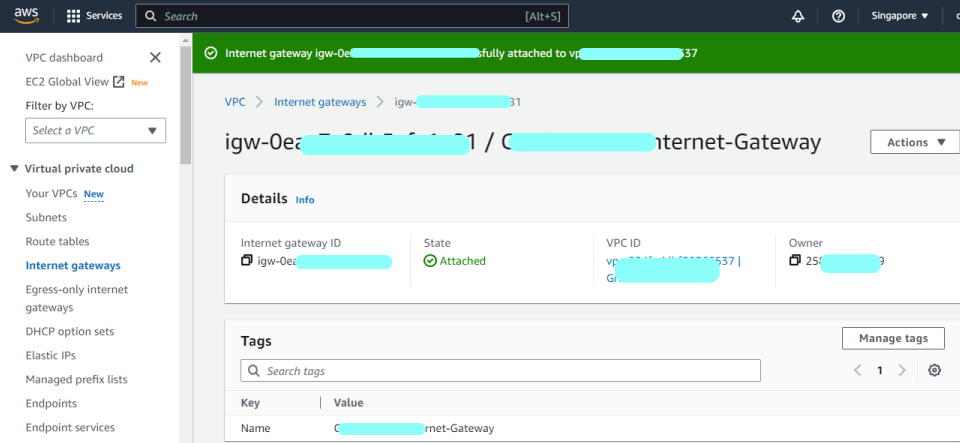
- Create Internet Gateway: In order for instances within your VPC to communicate with the internet, you'll need to create an Internet Gateway and attach it to your VPC. To create an Internet Gateway:
Click the "Create Internet Gateway" button on the VPC dashboard.
Give it a name tag.
Attach the Internet Gateway to your VPC.
- Create Route Table: A route table is used to determine how traffic is routed within your VPC. To create a route table:
Click the "Create Route Table" button on the VPC dashboard.
Give it a name tag.
Choose the VPC you just created.
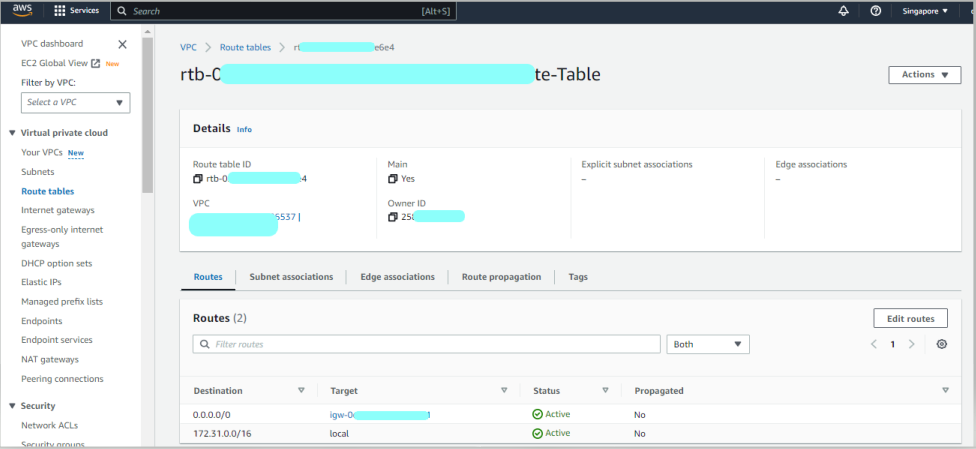
- Add Routes to Route Table: Once you've created your route table, you'll need to add a default route to it that directs traffic to the Internet Gateway you created earlier. To do this:
Select the route table you just created on the VPC dashboard.
Click the "Routes" tab.
Click the "Edit routes" button.
Add a route to the Internet Gateway with a destination of 0.0.0.0/0.
- Associate Subnet with Route Table: To ensure that instances within your subnet can access the internet, you'll need to associate the subnet with the route table you just created. To do this:
Select the subnet you created earlier on the VPC dashboard.
Click the "Route Table" tab.
Click the "Edit" button next to the "Route Table Association" setting.
Choose the route table you created earlier and click "Save."
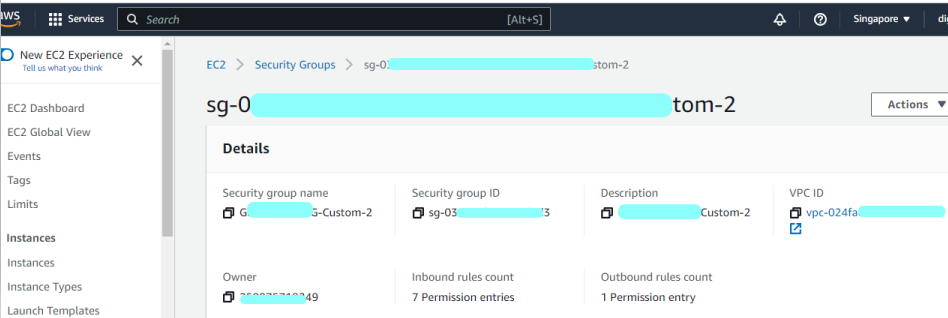
That's it! You've now created an AWS VPC along with a subnet, an Internet Gateway, a route table, and associated them together. You can now launch EC2 instances in your subnet, configure security groups and network ACLs to control access, and create other resources like NAT gateways, VPC endpoints, and VPN connections.
All done.
Thanks, Anil Kushwaha